Table of Contents
ToggleTankless water heaters promise endless hot showers and lower energy bills, but only if they’re properly maintained. Neglect these compact powerhouses, and mineral buildup will throttle performance, drive up energy costs, and shorten the unit’s lifespan by years. Unlike tank-style heaters that quietly rust away, tankless models demand active care. Hard water deposits clog heat exchangers, sediment clogs filters, and debris blocks venting, all fixable problems if caught early. Most homeowners can handle routine maintenance with basic tools and a Sunday afternoon. This checklist walks through the annual and periodic tasks that keep a tankless water heater delivering hot water on demand, whether it’s gas or electric, installed last year or a decade ago.
Key Takeaways
- Annual descaling and flushing is the most critical tankless water heater maintenance task, removing mineral buildup that reduces efficiency and can shorten the unit’s lifespan from 20+ years to just 10-15 years if neglected.
- A tankless water heater maintenance checklist should include checking the inlet screen filter every six months, inspecting venting systems twice yearly, and testing water pressure and flow rate to prevent performance issues and error codes.
- Most tankless water heater maintenance tasks like descaling, filter cleaning, and vent inspection are DIY-friendly, but gas line work, electrical troubleshooting, and heat exchanger repairs require licensed professionals due to safety and code requirements.
- Hard water deposits are the primary enemy of tankless heaters; homes with water hardness above 7 grains per gallon should flush every six months using white vinegar or commercial descaling solution to maintain optimal performance.
- Regular professional service every 1-2 years ($150–$300) catches small issues early and helps maintain warranty coverage, preventing costly premature replacements that can exceed $3,000.
- Installing a whole-house water softener ($400–$2,500) dramatically reduces descaling frequency and extends the life of all water-using appliances, especially valuable in hard water areas.
Why Regular Maintenance Matters for Tankless Water Heaters
Tankless water heaters run hot water through a heat exchanger at speeds that would make a garden hose jealous, often 2 to 5 gallons per minute. That velocity, combined with high heat, bakes minerals from hard water onto the exchanger’s copper or stainless steel coils. Calcium and magnesium deposits accumulate fastest in areas with water hardness above 7 grains per gallon (gpg), which covers roughly 85% of the U.S.
When scale builds up, the unit works harder to reach set temperatures. Efficiency drops, energy bills climb, and the burner or heating element cycles more frequently. Left unchecked, heavy scaling can trigger error codes, reduce flow rate, and eventually crack the heat exchanger, a repair that often costs more than replacement.
Beyond efficiency, safety is on the line for gas models. Blocked venting or dirty burners can cause incomplete combustion, releasing carbon monoxide or sooting up the combustion chamber. Regular inspections catch these issues before they become hazards. Most manufacturers require annual maintenance to keep warranties valid, so skipping service can void coverage on a unit that costs $800 to $3,000 installed.
The payoff is measurable: a well-maintained tankless heater lasts 20+ years versus 10 to 15 for neglected units, and annual upkeep costs a fraction of premature replacement.
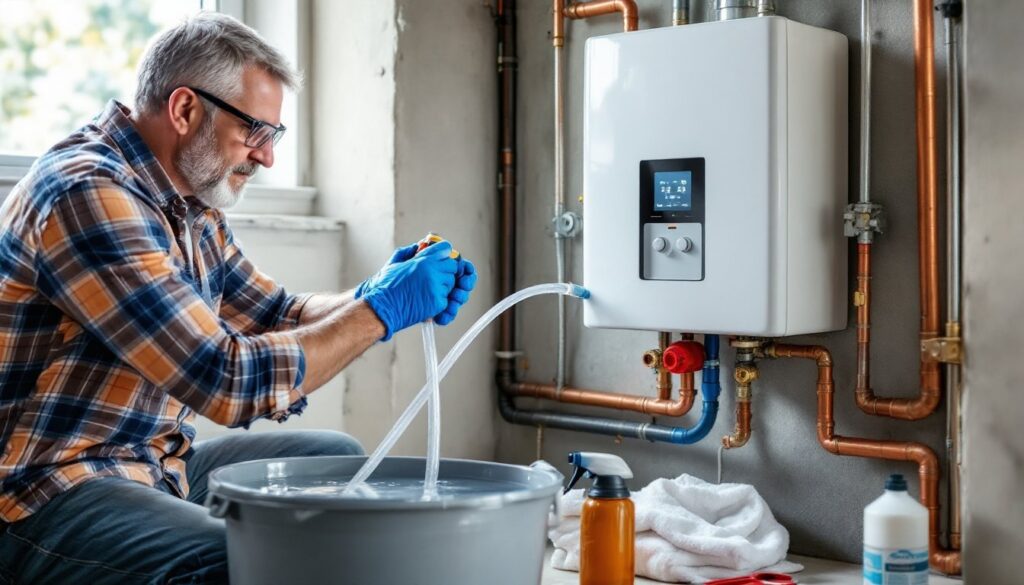
Annual Descaling and Flushing: Your Most Important Task
Descaling, also called flushing, is the cornerstone of tankless maintenance. It dissolves mineral buildup inside the heat exchanger, restoring flow and efficiency. Plan to do this once a year minimum: homes with very hard water (above 10 gpg) should flush every six months.
Materials needed:
- Food-grade white vinegar (2 to 3 gallons) or commercial descaling solution (citric acid-based products like Calci-Free or Rydlyme work faster but cost more)
- Submersible pump (1/6 HP utility pump from any hardware store)
- Two washing machine hoses or the flush kit hoses that came with your unit
- 5-gallon bucket
- Adjustable wrench or channel locks
- Bucket or towels for spillage
Safety: Shut off the electrical breaker (electric models) or the gas supply valve (gas models) before starting. Close the cold water isolation valve leading into the heater. Wear gloves and safety glasses, descaling solution can splash.
How to Descale Your Tankless Water Heater
-
Locate the service valves. Most tankless units have three valves on the bottom: cold inlet, hot outlet, and sometimes a purge valve. The inlet and outlet valves should have service ports with caps (often blue for cold, red for hot). If your unit lacks these, call a plumber to install them, they’re code in many jurisdictions and necessary for flushing.
-
Close the isolation valves. Turn the cold inlet and hot outlet ball valves perpendicular to the pipes (closed position). Open a hot water faucet somewhere in the house to relieve pressure.
-
Remove the service port caps and attach hoses. Connect one hose from the cold service port to the pump outlet. Place the pump in the bucket. Run the second hose from the hot service port back into the bucket, creating a closed loop.
-
Fill the bucket with 2 to 3 gallons of white vinegar (or descaling solution per manufacturer directions). Professional-grade descaling methods typically recommend vinegar for routine maintenance, though citric acid solutions cut flush time in half.
-
Run the pump and open both service valves. The pump circulates vinegar through the heat exchanger. Let it run for 45 to 60 minutes with vinegar, or 20 to 30 minutes with commercial descaler. You’ll see white sediment and flakes washing into the bucket, that’s scale breaking loose.
-
Flush with fresh water. After the vinegar cycle, close the hot service valve. Disconnect the hot hose and place it in a drain or outdoors. Open the cold inlet isolation valve briefly to flush fresh water through the unit and out the hot service port. This rinses residual vinegar.
-
Reconnect everything. Close service valves, remove hoses, reinstall caps (hand-tight, then a quarter turn with pliers, don’t over-torque). Open the cold and hot isolation valves fully. Close the relief faucet. Restore power or gas. Run a hot faucet until water flows steadily with no air sputtering.
Homeowners comfortable with basic plumbing tasks can complete this in about 90 minutes. If you’ve never done it, watch a manufacturer video first, brands like Rinnai, Navien, and Rheem post model-specific guides.
Cleaning or Replacing the Inlet Screen Filter
Every tankless heater has an inlet screen filter on the cold water supply line. This fine mesh catches sediment, pipe scale, and debris before it hits the heat exchanger. A clogged filter starves the unit of water, triggering low-flow error codes and weak hot water output.
Check the filter every six months, or quarterly if you have old galvanized pipes or well water. The process takes five minutes.
Steps:
- Turn off the cold inlet valve and relieve pressure (open a hot tap).
- Locate the filter housing on the cold inlet pipe, usually a small plastic or brass cylinder with a removable cap.
- Unscrew the cap with an adjustable wrench. The screen filter sits inside. Have a towel ready: a little water will dribble out.
- Inspect the screen. If it’s coated in sediment, rust, or white scale, rinse it under a faucet. For stubborn buildup, soak in white vinegar for 15 minutes, then scrub with an old toothbrush.
- Replace if damaged. Torn or corroded screens won’t protect the heat exchanger. Replacement screens cost $5 to $15 at plumbing suppliers or online. Match the mesh size to your unit (typically 60 or 100 mesh).
- Reinstall the screen and cap, making sure any O-ring or gasket is seated properly. Open the inlet valve and check for leaks.
Some units have a secondary filter in the hot outlet line or built into the heat exchanger assembly. Check your owner’s manual, models like the Noritz NRC series have internal filters that require disassembly to access. That’s a job for a pro unless you’re confident working with gas connections and combustion chambers.
Inspecting the Venting System and Air Intake
Gas tankless heaters vent combustion gases through PVC, CPVC, or stainless steel pipes (depending on condensing vs. non-condensing models). Blocked vents cause backdrafting, error shutdowns, and carbon monoxide hazards. Inspect venting twice a year, once before winter, once in spring.
What to check:
- Exterior vent termination. Look for nests, leaves, snow buildup, or bird guards that’ve rusted shut. The vent outlet should be clear and point away from windows, doors, or air intakes per IRC Section G2427. Most codes require at least 4 feet of clearance from openable windows.
- Vent pipe joints. Check PVC connections inside for gaps, cracks, or condensation leaks (common in condensing models). Tighten hose clamps or replace damaged sections with manufacturer-approved pipe and primer/cement.
- Slope and support. Condensing units need vent pipes sloped back toward the unit (¼ inch per foot minimum) so acidic condensate drains properly. Sagging pipes pool moisture and corrode.
- Air intake screen. Most units draw combustion air through a dedicated PVC intake pipe. Pop off the intake screen (usually a snap-fit cap) and rinse debris. A clogged intake starves the burner, causing sooting and incomplete combustion.
Safety: If you smell gas, see soot around the vent, or the unit frequently shuts down with a flame failure code, turn off the gas and call a licensed plumber or HVAC tech. Don’t attempt to clean burners or igniters yourself unless you’re trained, misadjusted gas valves are a serious hazard.
Electric tankless models don’t vent combustion gases, but still need clearance around the unit for cooling airflow. Keep the area within 12 inches of the heater free of storage, insulation, or clutter. Overheating can trip thermal cutoffs or damage circuit boards.
Testing Water Pressure and Flow Rate
Tankless heaters require minimum water pressure and flow rate to activate. Most units need at least 0.5 GPM flow and 15 to 20 PSI inlet pressure. Low pressure causes weak hot water or prevents the heater from firing at all.
Test inlet pressure annually with a pressure gauge threaded onto a hose bib or service port. Normal residential pressure runs 40 to 80 PSI. Below 30 PSI, you may need a booster pump (around $200 to $400 installed). Above 80 PSI, install a pressure-reducing valve (PRV) to prevent damage, code in many areas per IRC P2903.3.1.
Check flow rate at fixtures. Run the hot tap farthest from the heater (usually an upstairs bathroom) and measure output into a bucket for 10 seconds, then multiply by six. You should see at least 1.5 to 2 GPM for a shower, 0.5 GPM for a bathroom sink. Lower flow points to clogged aerators, failing pressure regulators, or undersized supply piping.
Clogged aerators and showerheads often mimic heater problems. Unscrew them, soak in vinegar overnight, and rinse. Replace any with flow restrictors rated below 1.5 GPM if you’ve upgraded to a higher-capacity tankless unit.
If you’ve recently upgraded from a tank to tankless and notice “cold water sandwiches” (brief cold bursts between hot draws), that’s a flow-cycling issue, not a pressure problem. The fix is usually a small recirculation pump or a tempering tank, consult the installer.
When to Call a Professional vs. DIY Maintenance
Most tankless maintenance is DIY-friendly, but certain tasks require licensed plumbers or HVAC techs due to complexity, safety, or code requirements.
Safe for confident DIYers:
- Annual descaling and flushing (after watching model-specific guides)
- Inlet screen filter cleaning
- Exterior vent and air intake inspection
- Aerator and showerhead cleaning
- Basic error code troubleshooting (consult the manual’s diagnostic chart)
Call a pro for:
- Gas line work. Disconnecting or testing gas connections requires licensing in most states. Mistakes cause leaks and explosions.
- Electrical troubleshooting. If your electric tankless trips breakers, shows error codes related to heating elements, or has a burnt smell, shut it off and call an electrician. These units pull 60 to 150 amps on dedicated circuits, serious voltage.
- Heat exchanger replacement or repair. Disassembling the combustion chamber, replacing igniters, or fixing cracked exchangers voids warranties and requires special tools.
- Venting modifications. Extending or rerouting vent pipes must comply with manufacturer specs and local codes. Inspectors fail DIY vent jobs routinely.
- Pressure relief valve testing. While you can lift the T&P valve lever annually to check operation, replacing it or adjusting pressure settings is best left to pros, especially since PRVs often require code-compliant discharge piping.
- Persistent error codes. If descaling and filter cleaning don’t resolve flow, ignition, or overheating errors, internal sensors or control boards may be faulty. Techs have diagnostic software and OEM parts access.
Annual professional service runs $150 to $300 depending on region and typically includes descaling, combustion analysis (gas models), filter replacement, and a full inspection. Routine system checks often catch small issues before they escalate. Many manufacturers recommend pro service every 1 to 2 years even for diligent DIYers.
If you’re handy and have hard water, consider installing a whole-house water softener ($400 to $2,500 installed). It drastically reduces descaling frequency and extends the life of all water-using appliances. Pair it with a comprehensive energy efficiency plan to maximize savings. For gas models, coordinate inspections with gas system maintenance to streamline service calls.
Finally, keep records. Log every flush, filter change, and service call in a notebook or phone app. Detailed maintenance tracking helps diagnose recurring problems and proves you’ve upheld warranty terms if a claim arises. Most failures aren’t the heater’s fault, they’re the result of deferred upkeep.