Table of Contents
ToggleThe Pacific Northwest’s reputation for relentless rain isn’t folklore, it’s a roofing reality. Between October and May, Seattle alone sees an average of 150 days of precipitation, and Portland isn’t far behind. That constant moisture, paired with moss-friendly shade and occasional freeze-thaw cycles, makes roof maintenance less of a seasonal chore and more of a year-round necessity. Homeowners who skip inspections often discover leaks only after water has already damaged sheathing, insulation, or interior ceilings. This guide walks through the maintenance tasks that keep Northwest roofs weathertight, the climate-specific problems to watch for, and when to call in a professional instead of climbing that ladder yourself.
Key Takeaways
- Northwest roof maintenance is essential year-round due to prolonged moisture, moss growth, and freeze-thaw cycles that can turn minor issues into expensive structural damage.
- Schedule the bulk of roof maintenance tasks—inspections, repairs, and debris removal—during the dry spring and summer months (May–September) when working conditions are safest.
- Address common northwest-specific problems like moss and algae growth, cedar shake deterioration, and flashing failures early to avoid costly replacements and preserve your roof’s lifespan.
- DIY homeowners can safely handle gutter cleaning, debris removal, individual shingle replacement, and moss-control strip installation using proper safety equipment and techniques.
- Call a licensed, bonded professional roofer for widespread damage, flashing repairs, structural issues, steep pitches over 8/12, and full roof replacements to ensure code compliance and warranty protection.
- Invest in a professional roof inspection every 3–5 years as preventive care; the $200–$400 cost can save thousands by catching underlayment and ventilation problems before major damage occurs.
Why Roof Maintenance Is Critical in the Pacific Northwest
The Northwest’s maritime climate creates a perfect storm for roof degradation. Unlike arid regions where shingles bake under relentless sun, roofs here stay damp for months at a time. Organic debris, fir needles, maple leaves, alder catkins, collects in valleys and behind chimneys, trapping moisture against the underlayment.
Moss and algae thrive in this environment, particularly on north-facing slopes that never fully dry out. Moss doesn’t just look bad: its root structure lifts shingle edges and creates pathways for water intrusion. Once moisture penetrates the underlayment, it reaches the OSB or plywood sheathing beneath, leading to rot that’s expensive to repair and often invisible until it’s advanced.
Freeze-thaw cycles, though less common than in the Mountain West, still occur in the Cascades foothills and during cold snaps. Water that’s seeped under damaged flashing or cracked shingles expands when it freezes, widening gaps and accelerating failure. Regular maintenance catches these issues while they’re still minor, before a $300 repair becomes a $8,000 sheathing replacement.
Insurance companies know the stakes. Some carriers in Oregon and Washington now require proof of regular roof inspections for homes with roofs older than 15 years. Neglect isn’t just a structural risk: it’s a coverage risk.
Seasonal Roof Maintenance Checklist for Northwest Homeowners
Roof maintenance in the Northwest follows the rain calendar, not the traditional four-season model. The goal is simple: inspect and repair during the dry months, then prepare and monitor during the wet ones.
Spring and Summer: Inspection and Repair Season
May through September offers the driest weather and safest working conditions. This is when homeowners should tackle the bulk of their maintenance.
Inspection tasks:
- Clear all debris from valleys, gutters, and around chimneys and vent pipes
- Check for lifted, cracked, or missing shingles, especially along ridge caps and eaves
- Inspect flashing around penetrations (chimneys, skylights, plumbing vents) for rust, gaps, or sealant failure
- Look for granule loss on asphalt shingles, bare spots indicate advanced wear
- Examine soffit vents and ridge vents for blockages that restrict attic airflow
Repair priorities:
- Replace damaged shingles before fall rains return
- Re-seal or replace flashing that’s pulled away from surfaces
- Apply zinc or copper moss-control strips along ridge lines (rainwater washes zinc down the roof, inhibiting moss growth)
- Trim overhanging branches to reduce shade and debris accumulation
- Clean gutters and downspouts: verify they drain at least six feet from the foundation
Wear gloves, soft-sole shoes with good grip, and safety glasses. If the roof pitch exceeds 6/12 (6 inches of rise per 12 inches of run), use a safety harness or hire a professional. Most injuries happen on simple tasks, not complex ones.
Fall and Winter: Preparation and Storm Readiness
By late September, the focus shifts to weatherproofing and monitoring. This isn’t prime repair season, working on wet roofing is dangerous and ineffective, but it’s critical for catching problems early.
Pre-winter tasks:
- Final gutter cleaning after leaf drop (typically late October)
- Secure any loose flashing or shingles flagged during summer inspections
- Check attic insulation and ventilation: poor airflow causes condensation that mimics leaks
- Verify that downspout extensions are in place and directing water away from the foundation
Winter monitoring:
- After heavy storms, inspect ceilings and attic spaces for water stains or drips
- Clear debris from gutters if accessible from a ladder (never climb onto a wet or icy roof)
- Watch for ice dams along eaves if temperatures drop below freezing, they indicate inadequate attic insulation or ventilation
Storm damage should be documented immediately with photos for insurance claims. Temporary repairs, like tarping a damaged section, can prevent further water intrusion until a professional can assess the situation.
Common Roof Problems Unique to the Northwest Climate
Certain roofing issues crop up far more frequently in the Northwest than elsewhere. Recognizing them early makes the difference between a quick fix and a major renovation.
Moss and algae growth: The most visible problem. Moss holds moisture against shingles and underlayment, shortening roof lifespan by years. Algae (the black streaks on many roofs) is mostly cosmetic but indicates chronic dampness. Manual removal works, but power washing can damage shingles. Low-pressure washing or brushing with a zinc sulfate solution is safer. Homeowners often reference guidance from Bob Vila for safe cleaning techniques.
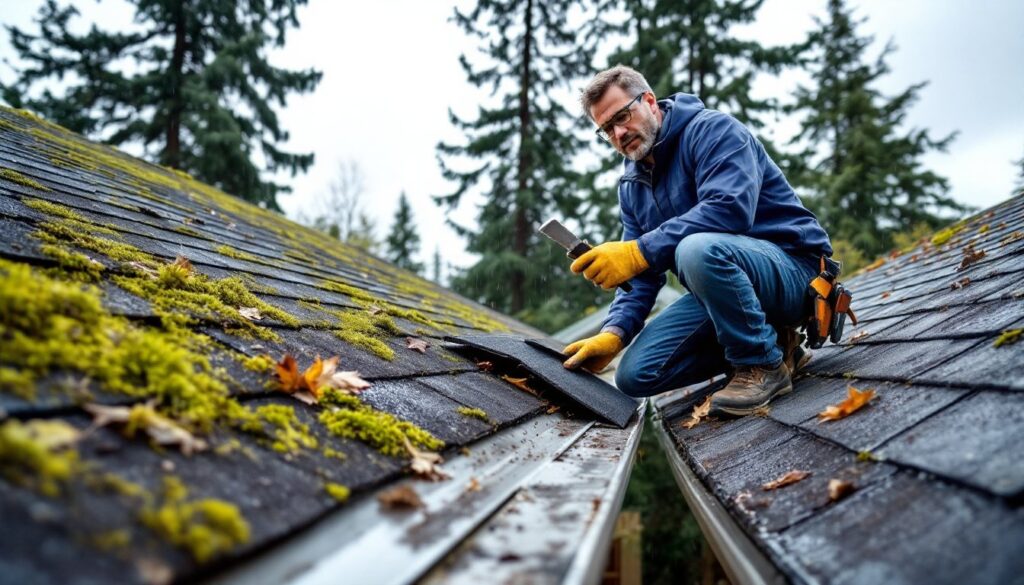
Cedar shake deterioration: Cedar shakes are common on older Northwest homes and have a beautiful weathered look, until they split, cup, or rot. Moisture is the enemy. Shakes need to dry between rains, which means good attic ventilation and minimal shade. Once rot sets in, individual shakes can be replaced, but widespread failure means a full re-roof.
Flashing failures around chimneys: Brick chimneys expand and contract with temperature swings, breaking the seal with metal flashing. Northwest rains exploit any gap. Step flashing (individual L-shaped pieces woven into shingle courses) is more durable than continuous flashing, but both need periodic re-sealing with polyurethane or butyl-based caulk, not silicone, which doesn’t adhere well to metal or masonry.
Clogged or undersized gutters: Five-inch K-style gutters are standard, but they’re often inadequate for Northwest downpours, especially on roofs with large surface areas or steep pitches. When gutters overflow, water cascades behind them, soaking fascia boards and soffit. Upgrading to six-inch gutters or adding extra downspouts can solve chronic overflow. Gutter guards reduce debris but require cleaning themselves: nothing is truly maintenance-free.
Ventilation and condensation issues: Poor attic ventilation causes condensation that drips onto insulation and sheathing. Homeowners mistake this for roof leaks. The fix isn’t roofing, it’s adding soffit vents, ridge vents, or gable vents to create airflow. A well-ventilated attic stays dry and extends shingle life.
DIY Roof Maintenance Tasks You Can Handle Yourself
Many Northwest roof maintenance tasks don’t require a contractor. With the right tools and a respect for safety, homeowners can handle routine upkeep and minor repairs.
Safe for most DIYers:
- Gutter cleaning: Use a sturdy extension ladder, a gutter scoop, and a bucket. Flush downspouts with a hose to verify they’re clear. Wear gloves, gutter sludge often contains sharp debris and bird droppings.
- Debris removal: A leaf blower or soft-bristle push broom clears valleys and flat sections without damaging shingles. Work from the ridge downward to avoid lifting shingle edges.
- Shingle replacement: Individual asphalt shingles can be replaced with a flat pry bar, roofing nails, and roofing cement. Slide the new shingle into place, secure it with four nails, and seal the edges. Matching the color to aged shingles is tough, but function matters more than aesthetics.
- Applying moss-control strips: Nail or adhere zinc or copper strips just below the ridge. Over time, rainwater carries trace metals down the roof, creating an environment moss can’t tolerate. This is prevention, not removal.
- Caulking minor flashing gaps: Small gaps around vent pipes or step flashing can be filled with polyurethane or butyl-based caulk. Clean the surface first and apply in dry conditions. This is a temporary fix, not a permanent repair.
Tools for DIY roof work:
- Extension ladder rated for your weight plus 50 pounds
- Safety harness and roof anchors (for pitches steeper than 6/12)
- Flat pry bar
- Roofing nailer or hammer and galvanized roofing nails
- Caulk gun and appropriate sealant
- Soft-bristle broom or leaf blower
- Safety glasses, gloves, and non-slip footwear
Many DIYers find detailed tutorials from Family Handyman helpful for visualizing the steps before starting a repair.
What to avoid:
Don’t attempt repairs on wet, icy, or steeply pitched roofs. Don’t use a pressure washer on asphalt shingles, it strips protective granules. And don’t walk on cedar shakes: they’re fragile and easy to crack.
When to Call a Professional Roofer in the Northwest
Some roof issues are beyond the scope of DIY work, either because they’re dangerous, require specialized tools, or involve structural components that affect building code compliance.
Call a professional for:
- Widespread shingle damage or missing sections: If more than a few shingles are compromised, the underlayment may be failing. A professional can assess whether a patch or a full replacement is needed.
- Flashing installation or major repairs: Chimney flashing, valley flashing, and skylight flashing require precise cutting, bending, and sealing. Poor flashing is a leading cause of leaks, and fixing a bad DIY job costs more than hiring a pro from the start.
- Any work on a roof steeper than 8/12 pitch: The fall risk is too high. Professionals have harnesses, roof jacks, and insurance.
- Structural damage: Sagging ridge lines, soft spots when walking, or visible water damage in the attic indicate sheathing or rafter problems. These are structural issues that may require permits and engineering review, especially in jurisdictions following the International Residential Code (IRC).
- Full roof replacement: Tearing off old shingles, replacing underlayment, and installing new roofing is a multi-day job requiring a crew, a dumpster, and often a permit. Homeowners save money on labor but risk voiding manufacturer warranties if installation doesn’t meet specs.
- Insurance claims: If storm damage is involved, most insurers require a licensed contractor’s estimate. DIY repairs can complicate claims.
When hiring, verify the roofer is licensed (required in Washington and Oregon), bonded, and insured. Ask for references and check recent work. Avoid anyone who offers to “work with your deductible” or pressures you to sign immediately. Finding the right contractor is easier when homeowners can compare local options, such as those listed for Northwest Harborcreek roofers.
Roofing permits are required for full replacements and some major repairs, depending on jurisdiction. Contractors typically pull permits as part of the job, but homeowners doing their own work must apply through the local building department.
A professional inspection every 3-5 years is a smart investment, even if the homeowner handles routine maintenance. Roofers spot problems, like failing underlayment or inadequate ventilation, that aren’t obvious from the ground. The $200-$400 cost of an inspection can prevent five-figure surprises down the road.