Table of Contents
ToggleA water softener is only as good as the care it receives. Neglect your Culligan system, and you’ll notice hard water spots creeping back onto dishes, reduced efficiency, and eventually a costly repair bill. But here’s the good news: maintaining a Culligan water softener isn’t difficult. Most tasks take just a few minutes each month and require no special tools. This guide walks through the essential monthly checks, annual deep cleaning, and troubleshooting steps to keep your system running smoothly for years. Whether you’ve got a gold series model or an older Aqua-Sensor unit, these practices apply across the board.
Key Takeaways
- Regular Culligan water softener maintenance extends system lifespan to 15–20 years and prevents costly repairs by addressing small issues before they become major problems.
- Monthly maintenance tasks—checking salt levels, inspecting for salt bridges, and verifying proper brine tank function—take just 10 minutes and catch 90% of common problems.
- Annual deep cleaning includes brine tank inspection, venturi and nozzle cleaning, resin bed treatment with resin cleaner for iron-rich water, and component wear checks to maintain peak efficiency.
- Common issues like hard water returning, low pressure, and failed regeneration cycles can usually be diagnosed and fixed through troubleshooting steps like salt bridge removal and venturi cleaning.
- Use only solar or evaporated salt pellets in your Culligan system, keep the brine tank at least half full, and avoid overfilling to prevent mushing, salt bridges, and reduced system performance.
- Know when to call a professional: control valve failures, persistent error codes, and structural tank damage require licensed technician expertise to avoid warranty voidance.
Why Regular Maintenance Matters for Your Culligan System
Water softeners work hard, cycling thousands of gallons through resin beads, flushing brine, and regenerating on schedules most homeowners never see. Skip maintenance, and resin beds clog with iron or sediment, brine tanks develop salt bridges that block regeneration, and efficiency drops by 30% or more.
Regular upkeep does three things: it extends the lifespan of internal components (valves, seals, resin), maintains soft water quality throughout your home, and prevents emergency breakdowns that require a service call. Culligan systems are built to last 15–20 years with proper care, but that longevity depends on addressing small issues before they cascade.
Most maintenance tasks are non-technical. You’re checking levels, breaking up blockages, and occasionally scrubbing a tank, no plumbing license required. If you can check the oil in your car, you can maintain a water softener. The payoff is consistent water quality and fewer repair costs down the line.
Essential Monthly Maintenance Tasks
Set a recurring reminder for these quick checks. They take 10 minutes total and catch 90% of common problems.
Checking and Refilling Salt Levels
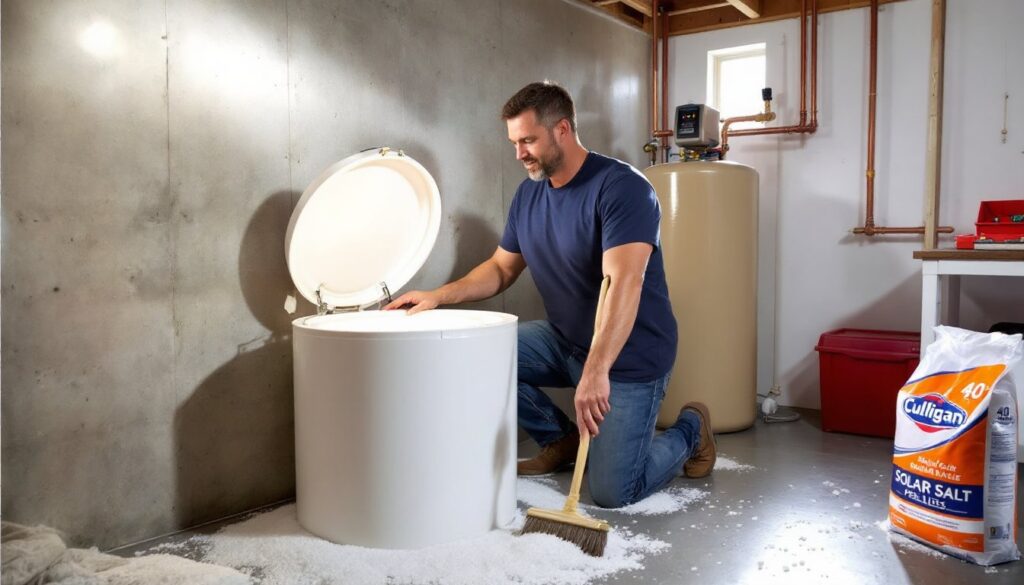
Open the brine tank lid and visually inspect the salt level. The tank should be at least one-quarter full at all times, ideally, keep it half full to ensure consistent regeneration cycles. Culligan systems use salt to create the brine solution that recharges resin beads, so running low means hard water starts slipping through untreated.
Use solar salt pellets or evaporated salt pellets specifically labeled for water softeners. Avoid rock salt: it contains impurities that leave residue and reduce efficiency. A 40-pound bag typically lasts a household of four about one month, though usage varies with water hardness and daily consumption.
When refilling, don’t overfill. Salt should sit a few inches below the water line visible inside the tank. If you see water above the salt, you may have a salt bridge or mushing problem (covered next). Pour salt gently to avoid compacting it at the bottom.
Pro tip: Mark the outside of your brine tank at the half-full line with a permanent marker. A quick glance tells you when it’s time to add more.
Inspecting for Salt Bridges and Mushing
A salt bridge is a hardened crust that forms above the water line, creating an air gap. Salt sits on top, but no brine forms below, so the system can’t regenerate properly. To check, gently push a broom handle or long stick down through the salt. If it hits a hard layer a few inches down that doesn’t give, you’ve got a bridge.
Break up salt bridges carefully. Tap the hardened layer with the broom handle until it collapses into the water below. Don’t use metal tools that might crack the tank. After breaking the bridge, let the system sit for four hours so the salt dissolves into brine, then manually trigger a regeneration cycle (consult your model’s manual for the button sequence, usually holding a button for 3–5 seconds).
Mushing is the opposite problem: salt dissolves into a sludgy paste at the tank bottom, clogging the brine well. You’ll notice this if the salt level doesn’t seem to drop even though the system running. To fix mushing, you’ll need to scoop out the wet salt sludge, flush the tank with warm water, and refill with fresh pellets. This repair is messier and covered in the annual maintenance section.
Both issues stem from high humidity, low-quality salt, or overfilling the tank. Keep the brine tank lid sealed when not in use, and stick to high-purity pellets.
Annual Deep Cleaning and System Checks
Once a year, schedule a Saturday morning for a deeper inspection. You’ll need a bucket, warm water, a long-handled brush, and possibly a resin cleaner (Iron Out or Res-Up work well for most Culligan models).
Step 1: Clean the brine tank.
Shut off water to the softener and bypass the system using the bypass valve (usually three valves at the inlet/outlet: turn the center valve perpendicular to the pipes). Empty remaining salt into a bucket or trash bag. Scoop out any sludge or sediment at the bottom. Wipe down the interior walls with warm water and a non-abrasive sponge, no soap, which leaves residue. Rinse thoroughly and let it air dry for 30 minutes before refilling with salt.
Step 2: Inspect the venturi and nozzle.
These small components create suction to draw brine during regeneration. They’re typically located under a cap on the control head. Consult your Culligan model’s manual for exact placement. Unscrew the cap, remove the venturi, and rinse it under warm water. Use a toothpick or small brush to clear any mineral buildup in the nozzle orifice. Even a tiny clog here stops brine draw and kills regeneration.
Step 3: Add resin cleaner (if needed).
If you have iron-rich water (common in well systems), resin beads accumulate iron and lose efficiency. Pour 4–8 ounces of resin cleaner directly into the brine tank before refilling with salt. The next regeneration cycle will flush the resin bed clean. Follow package instructions for dosage based on tank size.
Similar seasonal repair guides recommend resin cleaning every 6–12 months in areas with hard well water. If your water source is municipal and moderately hard, once a year is plenty.
Step 4: Check for leaks and wear.
Inspect tubing, O-rings, and connections around the control valve and brine line. Look for calcium deposits, cracks, or moisture. Replace any worn O-rings, they’re inexpensive and available at hardware stores or through Culligan dealers. Tighten loose fittings by hand: don’t over-torque plastic threads.
Turn the system back on, run a manual regeneration, and listen for unusual sounds: grinding, hissing, or prolonged motor running. These signal mechanical issues that may need a technician.
Wear PPE: Use gloves when handling resin cleaner and old salt sludge. Safety glasses protect against splashes if you’re working around the control valve.
Troubleshooting Common Culligan Water Softener Issues
Even with regular maintenance, you’ll occasionally run into hiccups. Here’s how to diagnose and fix the most common problems.
Hard water returning:
First, confirm the system is regenerating. Check the control panel for error codes or blinking lights (refer to your manual for code meanings). Verify salt levels and break up any bridges. If salt and regeneration are fine, the resin bed may be exhausted and need replacement, typically a job for a Culligan technician, as it involves removing the tank and swapping resin media.
Low water pressure:
Bypass the softener using the bypass valve. If pressure returns to normal, sediment or resin fines are clogging the system. Backwash the unit by running a manual regeneration. If pressure is still low with the softener bypassed, the issue is elsewhere in your plumbing, not the softener.
System won’t regenerate:
Check the power supply and ensure the control head is plugged in (some models have battery backup: replace batteries annually). Inspect the timer settings. Many Culligan units regenerate based on water usage or a timed schedule: incorrect settings prevent cycling. If the venturi is clogged (see annual cleaning), brine won’t draw and regeneration fails.
Recommendations from plumbing fixes suggest testing the brine line for kinks or blockages. Disconnect the line at the control valve and blow through it gently, it should be clear.
Salt level not dropping:
Usually caused by mushing or a salt bridge. Break the bridge or clean out the sludge as described earlier. If salt still doesn’t drop after several cycles, the float mechanism inside the brine well may be stuck. This requires disassembling the brine tank and cleaning or replacing the float, doable for a confident DIYer, but consider calling Culligan if you’re unsure.
Overflowing brine tank:
This points to a faulty float valve or a stuck brine line check valve. Shut off water to the softener immediately to prevent flooding. Inspect the float assembly for debris or damage. If the line valve is stuck open, brine continuously refills. Replacing these parts is straightforward but requires ordering Culligan-specific components. Many home maintenance checklists highlight valve inspections as a preventive step.
When to call a professional:
If you encounter control valve failures, persistent error codes after troubleshooting, or leaks from the tank body (not fittings), contact a licensed Culligan technician. Structural tank damage or complex valve rebuilds aren’t DIY-friendly and may void warranties if attempted.
Conclusion
Maintaining a Culligan water softener boils down to three habits: keep salt fresh and sufficient, inspect monthly for bridges or clogs, and deep-clean the system annually. These steps take minimal time but deliver years of reliable soft water and protect a significant investment in your home’s plumbing infrastructure. Tackle the small tasks now, and you’ll avoid the big headaches later.