Table of Contents
ToggleA split AC system is one of the most efficient ways to cool your home, but only if it’s maintained properly. Neglect it, and you’ll see higher energy bills, reduced cooling capacity, and potentially expensive repairs. The good news? Most split AC maintenance tasks are straightforward enough for homeowners to handle without calling in a technician every month. This guide walks through the monthly checks you can do yourself, seasonal deep cleaning steps, and when it’s time to hand things over to a professional. Whether you’ve had your system for years or just installed one, staying on top of maintenance keeps it running smoothly and extends its lifespan.
Key Takeaways
- Regular split AC maintenance prevents higher energy bills, reduces cooling capacity loss, and extends your system’s lifespan by 5–10 years compared to neglected units.
- Clean or replace air filters monthly during cooling season to maintain efficiency and improve indoor air quality, as clogged filters alone can reduce efficiency by 5–15%.
- Monthly inspections of your condensate drain, outdoor condenser fins, and indoor unit take just 15–30 minutes and help catch small issues before they become expensive repairs.
- Seasonal deep cleaning of evaporator coils, condensate pans, and condenser units twice yearly removes accumulated grime and maintains peak cooling performance.
- Call a licensed HVAC technician for refrigerant issues, electrical failures, ice buildup on coils, or water leaks inside your home, as these require specialized certification and tools.
- Schedule an annual professional tune-up ($100–200 per year) to check refrigerant charge, test electrical connections, and inspect the blower motor, which prevents most emergency service calls.
Why Regular Split AC Maintenance Matters for Your Home
Split AC systems rely on two units, an indoor air handler and an outdoor condenser, working in sync to move refrigerant and transfer heat. When dirt, dust, or debris clogs filters, coils, or drainage lines, the system has to work harder to achieve the same cooling effect. That extra strain translates directly into higher electricity costs and shorter equipment life.
Regular maintenance keeps energy consumption in check. A clogged filter alone can reduce efficiency by 5–15%, according to the U.S. Department of Energy. Cleaning or replacing filters monthly during peak cooling season prevents this drop-off and ensures air circulates freely through the indoor unit.
Maintenance also catches small issues before they become expensive failures. A slow refrigerant leak, a failing capacitor, or a blocked condensate drain might not stop your AC immediately, but ignoring them leads to compressor damage or water damage inside your walls. Routine inspections give you a chance to spot warning signs early.
Finally, keeping your system clean improves indoor air quality. Filters trap dust, pollen, and other particulates. When they’re saturated, contaminants recirculate into your living space. Regular filter changes and coil cleaning mean cleaner air for your household.
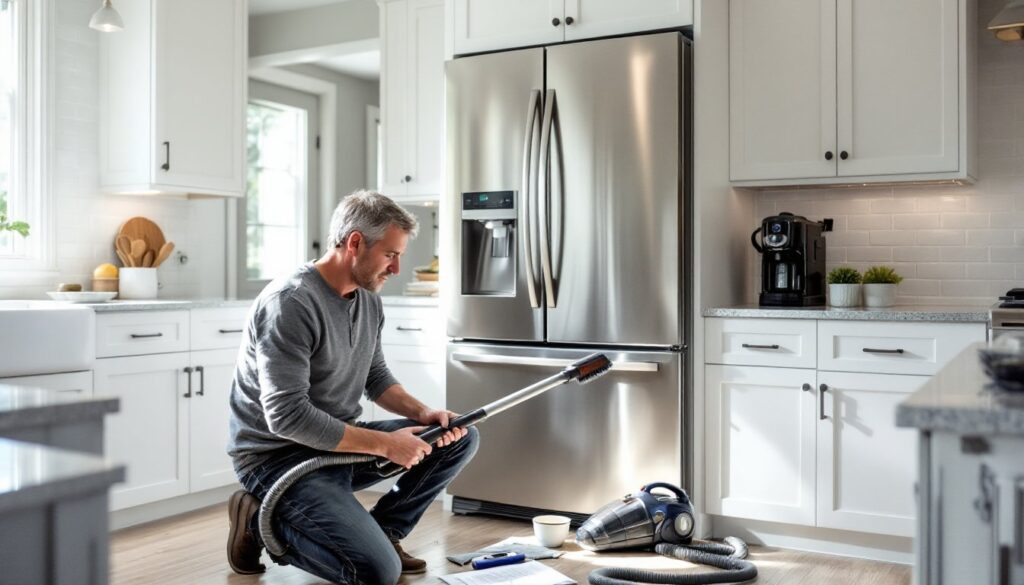
Essential Monthly Maintenance Tasks You Can Do Yourself
Most split AC systems need attention once a month during cooling season and less frequently in milder months. These tasks don’t require specialized tools and take 15–30 minutes total.
Cleaning and Replacing Air Filters
The air filter in your indoor unit is the first line of defense against dust and debris. Depending on your model, it’s either a washable mesh filter or a disposable pleated filter.
For washable filters:
- Turn off the AC unit at the thermostat and the breaker.
- Open the front panel of the indoor unit. Most snap off or slide up.
- Remove the filter. If it’s dusty, vacuum it gently with a brush attachment.
- Rinse the filter under lukewarm water. Use a soft brush and mild dish soap if there’s visible grime.
- Let it air-dry completely, usually 1–2 hours, before reinstalling. Never put a damp filter back in.
For disposable filters:
Check the size printed on the edge (common sizes are 1-inch pleated filters sized to fit the unit). Replace monthly during heavy use. If you’re in a dusty environment or have pets, check every two weeks.
A dirty filter restricts airflow, forcing the blower motor to work harder and potentially causing the evaporator coil to freeze. If you notice frost buildup on the indoor unit, a clogged filter is often the culprit.
Inspecting the Indoor and Outdoor Units
Indoor unit inspection:
- Check the condensate drain line for standing water or algae buildup. This small plastic line runs from the indoor unit to a drain or outside. Pour a cup of distilled white vinegar or a tablespoon of bleach diluted in water down the drain line every month to prevent clogs.
- Listen for unusual sounds, grinding, squealing, or rattling can indicate a failing blower motor or loose components.
- Wipe down the exterior with a damp cloth. Dust and grease buildup around vents reduces efficiency.
Outdoor unit inspection:
- Clear leaves, grass clippings, and debris from around the condenser unit. Maintain at least 2 feet of clearance on all sides for proper airflow.
- Check the condenser fins (the thin metal slats on the sides). If they’re bent, airflow is restricted. You can straighten minor bends with a fin comb, available at most hardware stores for under $10.
- Look for signs of refrigerant leaks: oily residue around the refrigerant lines or hissing sounds. If you spot either, call a technician, refrigerant work requires EPA certification.
Performing these simple inspections helps homeowners identify problems early, much like the preventive steps outlined in seasonal maintenance checklists for other home systems.
Seasonal Deep Cleaning: Step-by-Step Guide
Once or twice a year, ideally before cooling season starts and again in fall, do a more thorough cleaning of both units. This goes beyond monthly filter swaps and addresses the parts that accumulate grime over time.
Tools and materials you’ll need:
- Garden hose with a spray nozzle
- Coil cleaner (foaming, no-rinse formula works well)
- Soft brush or old toothbrush
- Screwdriver (typically Phillips-head)
- Shop vacuum
- Safety gear: gloves and safety glasses
Indoor unit deep clean:
- Turn off power at the thermostat and breaker.
- Remove the front panel and filter.
- Inspect the evaporator coil (the finned metal component behind the filter). If it’s dusty, vacuum gently with a brush attachment.
- Spray the coil with a no-rinse foaming coil cleaner, following the product instructions. The foam lifts dirt and drips into the condensate pan.
- Clean the condensate pan with a mild bleach solution (1 tablespoon bleach per gallon of water) to kill mold and algae.
- Check the drain line exit point outside. If water isn’t dripping freely when the system runs, the line may be clogged. Use a wet/dry vacuum to suction out blockages from the exterior drain opening.
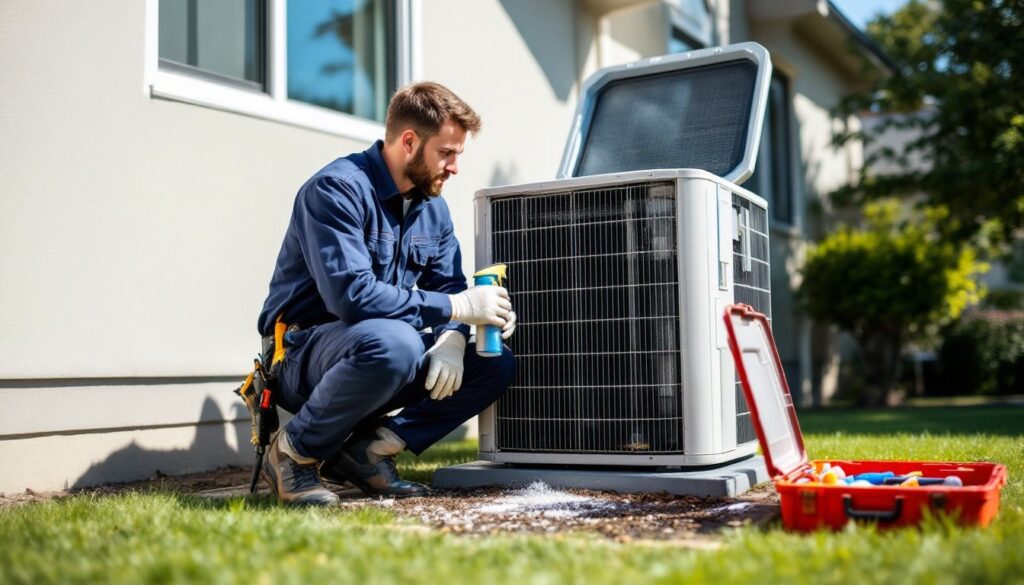
Outdoor unit deep clean:
- Turn off power at the disconnect box near the condenser.
- Remove the top grille (usually secured with screws). Lift out any debris, leaves, twigs, or even small animals have been known to nest in condensers.
- Use a garden hose to spray the condenser coils from the inside out. This pushes dirt and debris out through the fins rather than deeper into the unit. Use moderate water pressure: a pressure washer can damage the fins.
- For stubborn grime, apply coil cleaner, let it sit per the label instructions, then rinse.
- Check the fan blades for cracks or damage. Wipe them down with a damp cloth.
- Reinstall the grille and restore power.
This level of cleaning is common in maintenance routines recommended by HVAC professionals and helps maintain peak efficiency. If you’re uncomfortable working with electrical components, hire a technician for this part, most charge $75–150 for a seasonal tune-up, though pricing varies by region and service level.
When to Call a Professional for Split AC Service
Some split AC maintenance tasks require specialized tools, refrigerant handling certification, or electrical expertise. Knowing when to DIY and when to call a pro keeps you safe and prevents voiding your warranty.
Call a licensed HVAC technician if:
- Refrigerant levels are low. Adding refrigerant (often called “charging the system”) requires EPA Section 608 certification. Low refrigerant usually indicates a leak, which must be repaired before recharging.
- The system won’t turn on. This could be a capacitor failure, a faulty contactor, or a wiring issue. Capacitors store electrical charge and can shock you even when power is off.
- Ice forms on the indoor or outdoor coils. While a dirty filter is a common cause, ice can also signal low refrigerant, a failing expansion valve, or airflow problems that need diagnosis.
- The compressor won’t start or makes loud clanking noises. Compressor replacement is expensive, often 50% or more of a new system’s cost, but a technician can determine if it’s actually the compressor or a cheaper part like a start capacitor.
- Water leaks inside your home. A clogged drain line is a simple fix, but if the condensate pump has failed or the drain pan is cracked, you’ll need a professional repair to avoid drywall damage.
- You smell burning or notice sparking. Shut off power immediately and call a technician. Electrical faults are a fire hazard.
Annual professional maintenance:
Even if your system seems fine, an annual tune-up by a licensed tech is worthwhile. They’ll check refrigerant charge, test electrical connections, measure airflow, inspect the blower motor, and calibrate the thermostat. Many HVAC companies offer maintenance plans for $100–200 per year, which often includes priority service and discounts on repairs.
For guidance on finding reputable contractors and estimating service costs in your area, resources like HomeAdvisor provide contractor matching and pricing benchmarks based on local market rates.
Common Split AC Problems and How to Prevent Them
Understanding the most frequent issues helps you take preventive steps and recognize trouble early.
Frozen evaporator coils:
Caused by restricted airflow (dirty filter, blocked vents) or low refrigerant. Prevention: Change filters monthly, keep vents open, and schedule annual refrigerant checks.
Condensate drain clogs:
Algae and mold grow in the moist environment of the drain line, leading to blockages and water damage. Prevention: Flush the drain line monthly with vinegar or a diluted bleach solution. Install a drain line float switch if your system doesn’t have one, it shuts off the AC if the drain backs up, preventing overflow.
Dirty condenser coils:
Dust, pollen, and cottonwood seeds coat the outdoor coil, reducing heat transfer and forcing the compressor to run longer. Prevention: Hose down the condenser twice a year and keep vegetation trimmed back at least 2 feet.
Refrigerant leaks:
Pinhole leaks in refrigerant lines reduce cooling capacity and can damage the compressor. Prevention: Inspect refrigerant line insulation annually. If the foam insulation is cracked or missing, replace it to prevent condensation and physical damage to the lines.
Capacitor and contactor failures:
These electrical components wear out over time, especially in hot climates where the AC runs constantly. Prevention: Annual professional inspection catches capacitors that are swelling or contactors with pitted surfaces before they fail completely.
Thermostat issues:
Incorrect placement (near a heat source or in direct sunlight) or dead batteries cause erratic behavior. Prevention: Install the thermostat on an interior wall away from windows and heat-generating appliances. Replace batteries annually.
Lack of routine maintenance:
This is the root cause of most split AC failures. A system that’s cleaned and inspected regularly will last 15–20 years. One that’s neglected often fails within 10. Prevention: Stick to the monthly and seasonal tasks outlined above, and don’t skip the annual professional tune-up.
By staying proactive, homeowners avoid the majority of emergency service calls and keep their split AC running efficiently through years of cooling seasons.